How To Install Rapidbike Evo Fuel Controller Module on a BMW S1000RR


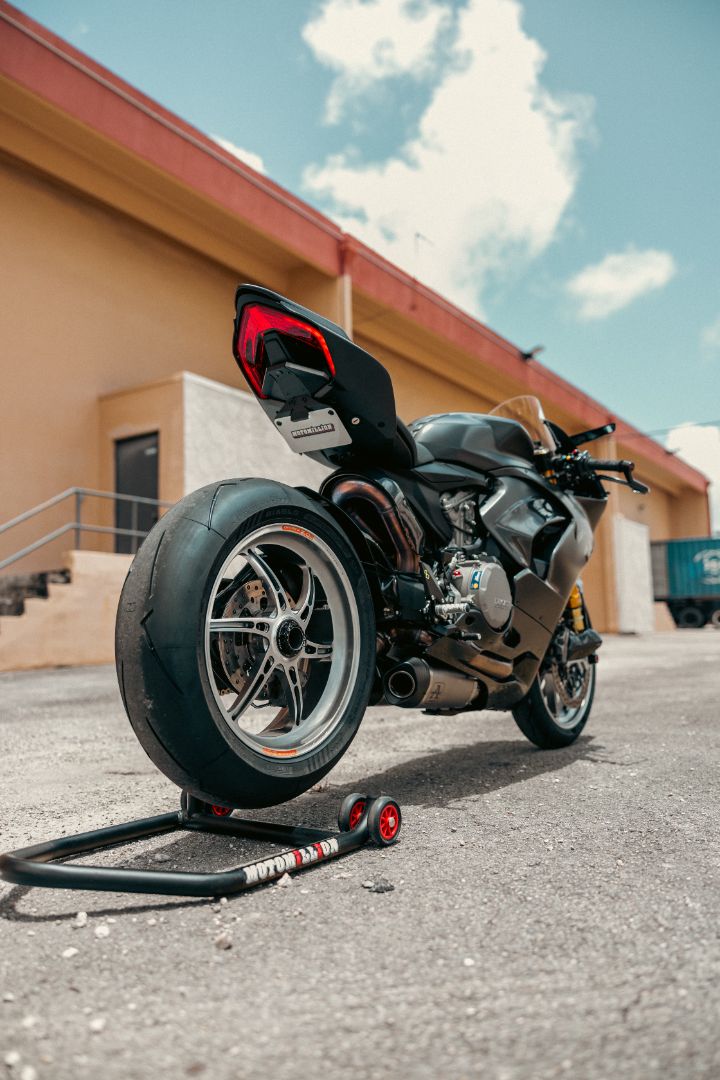
Rapidbike EVO is our favorite fuel controller module and it is by far the best product of its kind which is available on the market today. Naturally, this is what we installed on our BMW S1000RR in order to maximize the power gains from the Sprint P08 Filter and the Akrapovic Evolution Line full titanium exhaust system that are already on this bike.
This is a detailed how-to install for the Rapidbike EVO fuel controller module, the bike in picture is a 2015 model year, but installation steps are identical for the 2015 to 2017 model years.
Installation is fairly simple, however you will need to pay attention to the routing of the wires to make sure nothing gets pinched once you start putting the bike's components back together. So while performing the install, try to keep the wiring as neat and tidy as possible.
We recommend having as little fuel in the gas tank as possible before performing this install.
To view the product being installed in our store, click HERE
Tools you will need are:
- T25 Torx Driver
- T30 Torx Driver
- Side Cutter Pliers
- 10mm Socket
- Rag
Let's Begin!
- Start by removing the side fairings, riders seat, rear seat, tank cover, tank side panels and finally the gas tank. The gas tank has two connectors underneath, and the fuel line comes off when you twist it, make sure to lay a rag underneath the gas tank to catch the gas that will spill from the line once its disconnected.


-
Feed the wiring harness into the tail section from the left hand side of the bike. The large orange connector is what the module will connect to, and this is what you want in the tail section, along with the accessory connectors next to it.


-
In order to make room to feed the rest of the wiring harness, loosen the four bolts of the seat bracket which is on the rear subframe.

-
Run the harness under the seat bracket, you can see the Rapidbike Evo harness highlighted in red in the picture below, to give you an idea on how to route it.

-
Locate the four lower injectors. Injector #1 will be the left most injector and it continue in numerical order.
Injector #1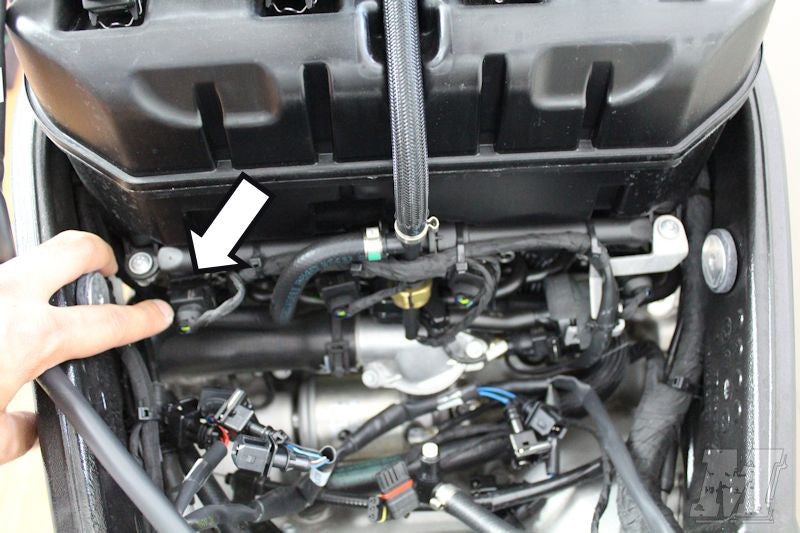 Injector #2
  Injector #3
  Injector #4
-
Connect the Rapidbike Evo harness inline to each injector as numbered on the harness.


-
Locate the four upper injectors. Injector #5 will be the left most injector and it continue in numerical order.
Injector #5 Injector #6
  Injector #7
  Injector #8
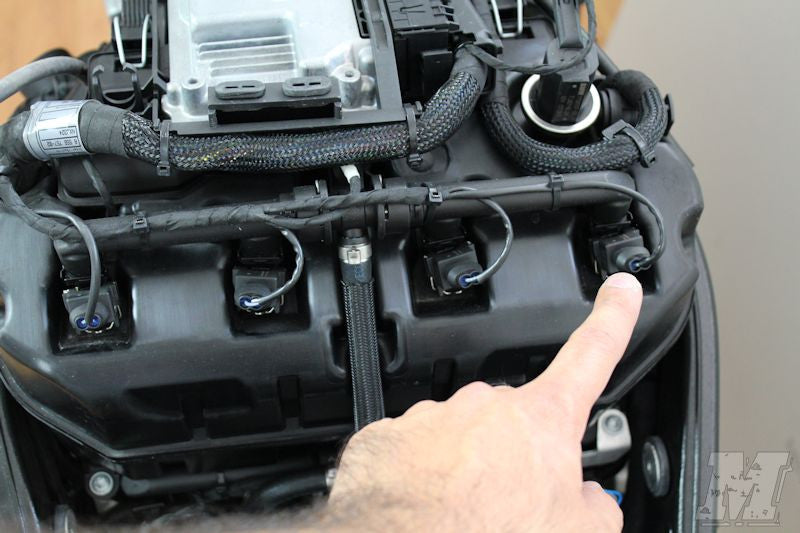
-
Connect the Rapidbike Evo harness inline to each injector as numbered on the harness.

-
Locate the 2-pin black connectors for the crankshaft sensor and connect the Rapidbike connectors in-line with the stock connectors.


-
Locate the grey, 6-pin connector for the TPS sensor, and identify the wire which is connected to the number 2 pin of the connector. Using the posi-tap connector provided, connect the green wire from the Rapidbike EVO harness to the wire coming out of the number 2 pin of the TPS connector.


-
Locate the 4-pin black connectors for the O2 sensor on the left side of the bike and connect the Rapidbike connectors in-line with the stock connectors. Use zipties to neatly secure the connectors together as shown in the second picture below.


-
Locate the 4-pin black connectors for the O2 sensor on the right side of the bike and connect the Rapidbike connectors in-line with the stock connectors. Use zipties to neatly secure the connectors together as shown in the second picture below.


-
Locate the 3-pin black connectors for the gear position sensor and connect the Rapidbike connectors in-line with the stock connectors.


-
Double check all the connectors that was just installed in the steps above to make sure everything is connected securely. Start tidying up the Rapidbike Evo wiring harness to make sure the gas tank will slide into place without pinching any wires and/or hitting any of the connectors. Use zip ties to secure the harness at necessary places. In this case, we used secured the upper injector harness at two locations, and the main Rapidbike Evo harness on the left side near the frame.

-
Connect back the two connectors and the fuel line back underneath the tank, and mount the tank into place. Do not force the tank into place if it is hitting any of the connectors or wires, just try to tuck away the wires or connectors and try again. Once the tank is in place, do not forget to reattach the two breather wires located at the front top sides of the gas tank.

-
Connect the black wire from the Rapidbike Evo wiring harness to the negative terminal of your battery.

-
Lastly, connect the large connector from the Rapidbike Evo wiring harness located under the rear seat to the Rapidbike Evo module. We tucked away the accessory connectors right under the tool kit spot, and used zip ties to secure the Rapidbike Evo module so that it isn't freely moving around under the seat while riding.

-
If you've followed all the steps correctly, your bike should now start and the atuo-adaptive feature will start to immediately make required adjustments to the tune of your bike.
-
Once you've verified that the bike starts, re-sintall the side fairings, riders seat, rear seat, tank cover, tank side panels.


 Injector #2
  Injector #3
  Injector #4


 Injector #6
  Injector #7
  Injector #8